|
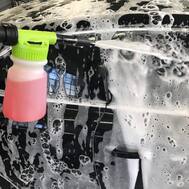
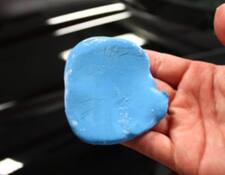
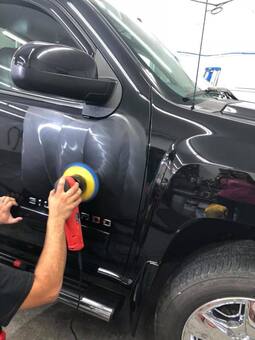
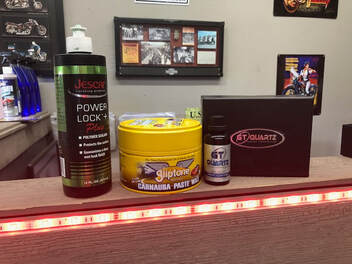
WHAT IS PAINT CORRECTION? Paint correction is the term detailers use to describe restoring and rejuvenating the vehicles paint. If your cars paint looks dull, hazed, oxidized, filled with light surface scratches or swirl marks then your car could use more than an exterior detail. If you do decide you would like to have your car paint corrected ensure that you are going to a reputable and experienced detailer. An inexperienced detailer can do some pretty extensive damage to your cars paint that may or may not be able to be corrected. I will give you a list of questions to ask the detailer before trusting them with such a serious job. Many people get very confused between an exterior detail and a full paint correction and they are two completely different services. And I am here to teach you the difference. An exterior detail takes about 2 hours give or take, the car is prepped, decontaminated, 1 stage spot compound, 1 stage polish and a coat of wax. Paint correction is a process that can take anywhere from 6 hours to 20 plus hours of multiple stages of compound and polish. Lets discuss each product and its purpose before moving further into the explanation. WHAT ARE THE PRODUCTS USED FOR PAINT CORRECTION? To start a full paint correction the car needs to be fully prepped, the prep alone can take up to an hour and sometimes longer depending on how contaminated the car is. Most contamination that you can find on the exterior of a car is acid rain, iron, road grime, bird droppings, water stains, and scratches. In the prep we are going to focus on the dirt and contaminants. Step one is washing the car with a PH neutral soap we use gliptone foam blizzard soap. PH neutral soap balances out the iron and sediments in the water so you are not adding any additional contaminants to the paint. Be sure you are using a clean wash mitt to avoid adding additional swirl marks to you paint. Step two spray down the car with Gliptones Iron Eater. This stuff is amazing, and you can actually see it working. It causes a chemical reaction to iron which actually eats through the iron. You will see it change color from clear to purple once it starts working its process. What is so great about this product is that instead of dragging the iron across your cars paint while claying the car and creating more surface scratches and swirl marks, you are removing the harder elements. Now rinse. ,Step three Clay bar. Clay bar is made up of engineered resin similar to your kids clay but much harder and stickier. You will know if your car requires a clay bar simply by touching the paint after a wash. If your cars paint feels gritty, or sticky then you know that its time for some decontamination. Do not ever clay your car without any lubricant. We use optimum no rinse which is an insane product all on its own. But you will see while using the clay bar the amount of dirt that a simple wash could not remove. These contaminants that are sticking to your cars paint are causing damage in the clear coat the longer they sit on your exterior. So be sure to at minimum get an exterior detail twice a year. Also if you are an enthusiast and doing these steps all on your own be sure to follow steps one through 3 as if you don’t you will be adding more scratches and swirl marks to your car. You are now ready to rinse the car one final time and dry with a clean microfiber rag, and blow out any access water. After we choose to alcohol wipe the car to eliminate any more contaminants, wax and fillers from the paint. Step four we are now ready to start determining the condition of the clear coat on the car. How many stages of compound and polish we can apply. We use different methods of determining the clear coat on a cars paint, what year is the car, what make is the car, has the car ever been professionally detailed before, was the car ever repainted and or a paint gauge that measures the thickness of the clear coat. This should be one of your determining factors when choosing a detailer, their knowledge of the clear coat that is on the car. Many experienced detailers don’t require a paint gauge as these are relatively new to the industry, they use their eye and knowledge of what the paint looks like. Lets get to work! Step five is compound. What is compound? Compound is a liquid that allows the detailer to remove moderate to deep defects in the cars paint. Many detailers refer to this step as leveling or cutting. Essentially what this does is cuts lightly through a layer of clear coat to make a smooth leveled surface that will eliminate the swirl marks and light surface scratches. In this stage it is very important to go slow and steady with moderate pressure on the buffer, we use Mcguires Microfiber Cutting pads with Gliptones precision cut but for beginners we would recommend Grios fast correcting cream, it is less finicky and does not create as much dust. Depending on the depth of the scratches will determine how many times they have to do this process. For a full paint correction we are literally focusing on a 2x2 section to ensure the scratches are removed. There is no such thing as perfect but a true detailer will tell you that, paint correction can be done from 50%-90% corrected, this will all be determined on what you want to spend and how close to perfect you want your cars paint. A paint correction can be done in 5 hours all the way to 25 hours plus. Step six is polish. Polish is the liquid that makes your car shine! We use two different types of this polish. Gliptone and HD Speed. Make sure the detailer you are using does not use products with heavy polymers or fillers. These products simply fill or blend in the scratches and after a few weeks you will notice that your scratches start to reappear. This means the detailer did not correct the scratches simply covered them up. Which is why it is so important that when shopping around for prices you determine the knowledge that is behind those prices and the hours that a professional detailer will be working on your car. Step seven is locking in the shine and providing protection. There are three different methods a detailer can use on this final step. Choice one a simple coat of carnauba wax, thought not the best product to use after a paint correction job it does offer some form of paint protection but not for long. Please refer to my previous blog on the difference between wax vs sealant. The next option would be a sealant. Great choice for price and protection. And then your final option would be ceramic coating. Know the right questions to Ask your Detailer 1) How long does a paint correction take? If they tell you less than 5 hours please confirm what they intend to do in those 5 hours. It is likely that they will be using fillers or the extent of the paint damage is not that bad and an exterior detail may be able to take care of this for you without spending a fortune. Be knowledgeable when looking for this service. 2) Do any of your products you use while doing the paint correction use polymers or fillers? It does not matter the brand a detailer uses, there are many different brands in our industry, if the detailer chooses a certain brand its because they are comfortable with that one. But you do not want to be misled by their ability with fillers in their products. 3) How long have you been detailing cars? Paint correction is not something that can be learned over night, it takes an experienced detailer to be able to get your paint close to perfect. Do not choose the guy with the better price for this job, choose the guy with the most experience as if an error does occur it can wind up costing you a lot of money. 4)Do you even need a paint correction? This is a decision that only you can make for yourself, a regular exterior detail will cost a lot less but may not provide you with what you are looking for. Talk it over with your detailer, ask questions, and determine after you have gathered all your information.
6 Comments
|
Proudly powered by Weebly
 RSS Feed